Kedify Predictive Scaler - Installation
This guide will help you set up Kedify Predictive Scaler (also referred as Kedify Predictor) that will autoscale the target deployment based on historical data it learned from.
There are currently two ways to enable Kedify Predictor:
- from Kedify Service (the Dashboard)
- using Helm chart installation
Enabling Kedify Predictor Using Dashboard
Section titled “Enabling Kedify Predictor Using Dashboard”If you have chosen to install Kedify as a managed installation, this is the correct way to make the Kedify Predictor available in your cluster.
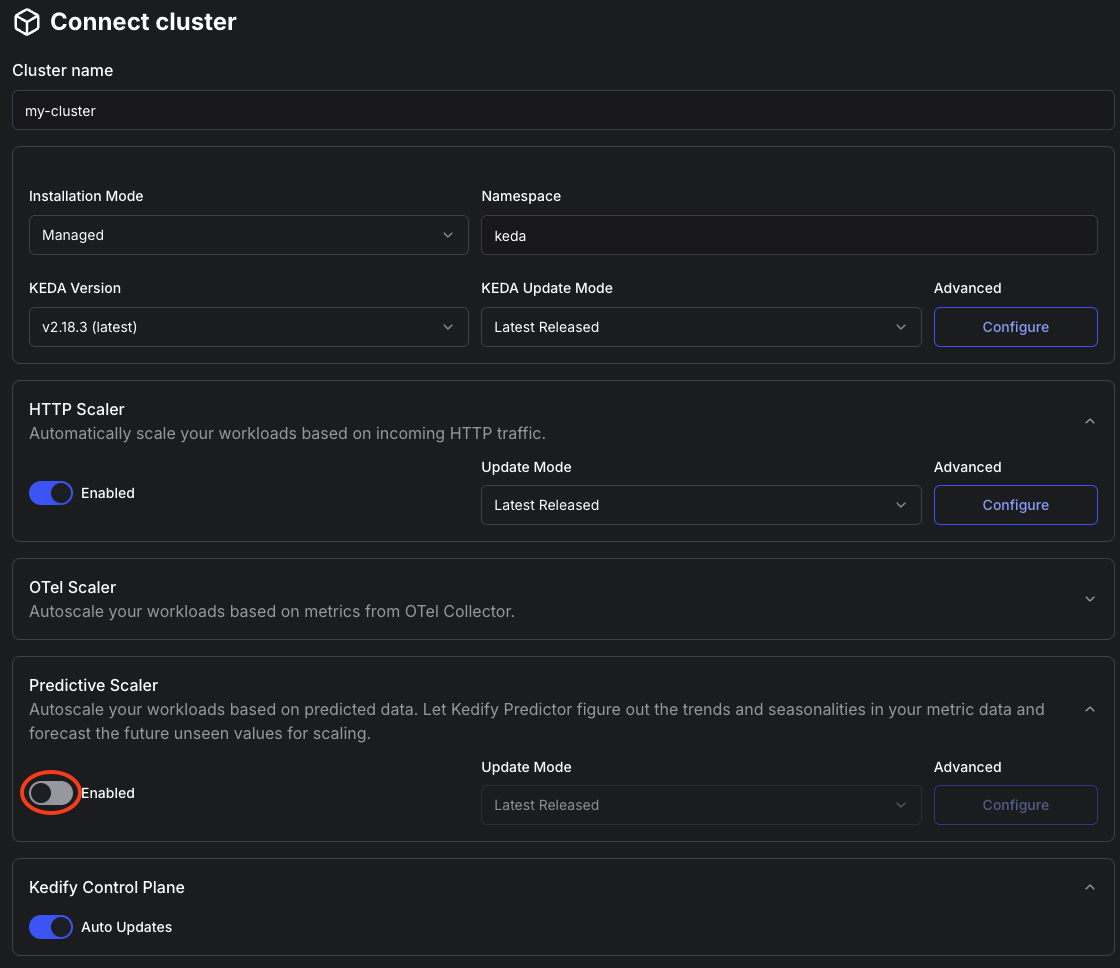
1. Enable Predictive Scaler in Your Cluster Settings
Section titled “1. Enable Predictive Scaler in Your Cluster Settings”Either create a new cluster or edit an existing one and make sure the “Predictive Scaler” toggle is on:
2. Optionally Tweak the Settings
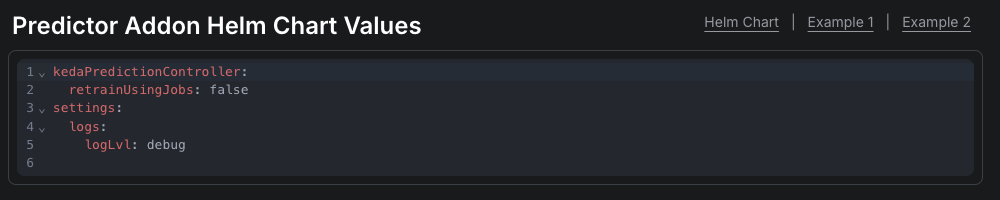
Section titled “2. Optionally Tweak the Settings”Either keep the default settings or click the “Configure” button and tweak the Helm chart values for the Kedify Predictor. Under the hood, the managed installation also uses Helm to render and deliver the Kubernetes manifests.
The following screenshot describes one of the provided examples for such Helm chart values:
Installing Kedify Predictor Using Helm Chart
Section titled “Installing Kedify Predictor Using Helm Chart”Predictor can be installed together with Kedify Agent by enabling its sub-chart:
helm repo update kedifykedahelm upgrade --install kedify-agent kedifykeda/kedify-agent -n keda \ --set ... \ --set kedify-predictor.enabled=true \ --set kedify-predictor.x=yor as a standalone Helm release. No matter what option you choose, the helm chart values are identical up to the YAML indentation.
Installing Using Standalone Helm Chart
Section titled “Installing Using Standalone Helm Chart”helm upgrade --install kedify-predictor oci://ghcr.io/kedify/charts/kedify-predictor -n keda \ -f predictor.valuesThen in case you would like to tune storage, resources or any other options, your Helm chart values may look like this:
settings: logs: logLvl: debug storage: modelsPvcSize: 600Mi dbPvcSize: 2Giresources: limits: memory: 700Mi requests: cpu: 300m memory: 256MiSetting up External PostgreSQL as Metric Store
Section titled “Setting up External PostgreSQL as Metric Store”By default, Kedify Predictor uses SQLite file-based DB and uses Kubernetes PVC and PV to store it. This, however, requires that your cloud provider allow mounting the same PV from multiple pods (ReadWriteMany), because model is being retrained by k8s jobs and it needs to be able to read from the DB file and also write to a filesystem where model is serialized in pickle format.
If you want to use an existing KEDA ScaledObject/ScaledJob as the live metric source, KEDA must be installed (or installed via kedify-agent), and raw-metrics gRPC must be enabled.
In order to use external DB follow these instructions:
1. (Optional) Set up PostgreSQL or skip this step if you already have one
Section titled “1. (Optional) Set up PostgreSQL or skip this step if you already have one”# create k8s secret with passwordkubectl create secret generic postgres-credentials -n keda \ --from-literal=postgres-password='AdminPassword' \ --from-literal=password='KedifyUserPassword'
# install helm chart with postgresqlhelm upgrade -i -n keda postgres oci://registry-1.docker.io/bitnamicharts/postgresql \ --set auth.database=kedify \ --set auth.username=kedify \ --set auth.existingSecret=postgres-credentials2. Install predictor with following helm values
Section titled “2. Install predictor with following helm values”cat <<VALS | helm upgrade -i kedify-predictor oci://ghcr.io/kedify/charts/kedify-predictor -n keda -f -kedaPredictionController: noSharedVolumes: truedb: type: postgres host: postgres-postgresql port: '5432' name: kedify user: kedify # password: KedifyUserPassword existingSecret: postgres-credentials existingSecretPasswordKey: passwordVALSEnabling KEDA to Feed the Metrics to Predictor
Section titled “Enabling KEDA to Feed the Metrics to Predictor”If you want to use an existing KEDA’s ScaledObject as a source for metrics, you need to enable the raw-metrics gRPC API on KEDA operator. To do this, tweak the helm charts for KEDA so that it has the RAW_METRICS_GRPC_PROTOCOL environment variable set to enabled and RAW_METRICS_MODE to pollinginterval or hpa. This feature is available in KEDA since version v2.18.1. If you
choose to use pollinginterval as the mode, the frequency of metric ingestion can be controlled by .spec.pollingInterval on ScaledObject or ScaledJob.
helm repo update kedifykedahelm upgrade -i kedify-agent kedifykeda/kedify-agent -n keda \ --set ... \ --set keda.env[0].name=RAW_METRICS_GRPC_PROTOCOL \ --set keda.env[0].value=enabled \ --set keda.env[1].name=RAW_METRICS_MODE \ --set keda.env[1].value=pollingintervalor just
kubectl set env deploy -n keda keda-operator RAW_METRICS_GRPC_PROTOCOL="enabled" RAW_METRICS_MODE="pollinginterval"OTLP Receiver
Section titled “OTLP Receiver”Another possible metric source to Kedify Predictor is the integrated OTLP gRPC receiver. It naturally fits to the OpenTelemetry ecosystem using the well-known protocol. This way, the Kedify Predictor Kubernetes service can be configured under the OTel Collector exporters section.
Example:
..exporters: otlp/keda: endpoint: kedify-predictor.keda.svc:4317..Then, if enabled also by creating the corresponding MetricPredictor (MP) resource, it will start storing the metrics.
Example:
kind: MetricPredictorapiVersion: keda.kedify.io/v1alpha1metadata: name: otel-sourcespec: source: otel: metricName: http_requests_total metricType: gauge # default gauge (gauge,sum,histogram,exponentialhistogram,summary) # metric has to have these labels in order to be recorded # requiredLabels: # namespace: prod # service: myapp model: type: Prophet name: kedify-predictor-otlp defaultHorizon: 5m retrainInterval: 1dThis will make sure that any incoming metric called http_requests_total will be stored as is in metric DB.
Further requirements for incoming metric, can be provided by requiredLabels field. Then all the key-value label pairs needs to be present on the incoming metric.
If any further calculations are required for the metrics (like aggregating them among the existing pods/labels). You may want to use OTel transformers (for simple linear transformations) or OTel Scaler and reference it in MP as .spec.source.keda.
For more info, consult this page.
Getting Started
Section titled “Getting Started”With this, your installation of Kedify Predictor is now complete and you can continue with:
- a how-to tutorial with a demo application
- a demo application using OTLP receiver and weather data
- full scaler docs